3D Sea Coaster: Starfish Coaster Design for Sublimation Workflows
Integrating high-quality digital assets into a creative workflow requires more than just finding an image; it demands understanding how that asset functions within the broader production pipeline. The 3D Sea Coaster: Starfish Coaster Design represents a specific type of digital resource tailored for sublimation printing, offering creators a streamlined path from concept to physical product. For professionals, hobbyists, and small business owners, the value of such a design lies not only in its aesthetic appeal but in its technical readiness. This article explores how this specific design fits into practical workflows, ensuring efficiency, consistency, and quality in final outputs.
Understanding the Asset Specifications
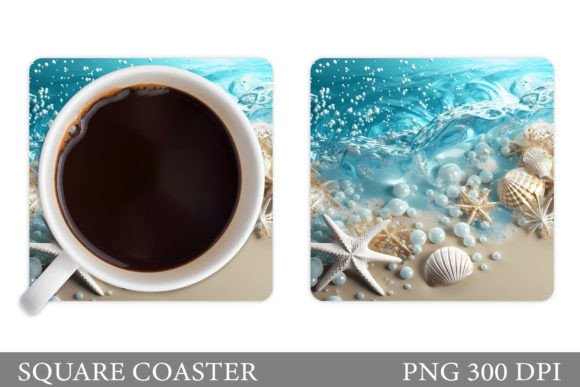
Before implementing any digital design into a production schedule, it is crucial to verify its technical specifications. The 3D Ocean Coaster Sublimation package typically includes a single PNG file rendered at 300 DPI (dots per inch), sized at 4x4 inches. These specifications are not arbitrary; they are industry standards for high-quality sublimation transfers.
The 300 DPI resolution ensures that when the image is printed onto sublimation paper and transferred to a coaster blank, the edges remain crisp, and the colors do not pixelate. Lower resolution files often result in blurry or jagged edges, which can detract from the perceived value of the final product. The 4x4 inch dimension is specifically calibrated for standard square coaster blanks, minimizing the need for manual resizing or cropping, which can introduce errors or distort the aspect ratio.
By starting with a file that is already optimized for the intended medium, creators save time during the pre-press phase. This preparation allows for a smoother transition from digital file to physical item, reducing the likelihood of print errors and material waste.
Integration into the Sublimation Workflow
The 3D Sea Coaster: Starfish Coaster Design is designed to slot seamlessly into existing sublimation workflows. Whether you are a seasoned entrepreneur managing a high-volume store or a hobbyist creating gifts, the process generally follows a consistent pattern: file preparation, printing, pressing, and finishing. Here is how this specific asset interacts with each stage.
Pre-Press Preparation and Compatibility
Upon downloading the zip file, the first step is extraction and organization. Maintaining a structured digital library is essential for long-term efficiency. Store the PNG file in a dedicated folder labeled by theme or product type. This organizational habit ensures that the asset is easily retrievable for future orders or batch productions.
Since the file is a PNG, it likely features a transparent background or a pre-defined border. Check the design against your specific coaster blank dimensions. While the file is 4x4 inches, some coaster blanks may have slight variations in size or rounded corners. Use graphic design software such as Adobe Photoshop, Illustrator, or free alternatives like GIMP or Canva to overlay the design onto a template of your specific blank. This visual check helps confirm that critical elements, such as the starfish details, are not cut off during the pressing process.
Compatibility extends beyond software. Ensure your printer is calibrated for sublimation inks. The vibrant blues and intricate textures of the 3D Ocean Coaster design rely on accurate color profiling. If your printer has not been profiled recently, run a test print on standard paper to verify color accuracy before committing to expensive sublimation paper and coaster blanks.
Printing and Transfer Execution
Once the design is verified, print it using sublimation ink on high-quality sublimation paper. Mirror the image before printing, as this is a standard requirement for sublimation transfers. The 3D effect of the sea coaster design depends heavily on the contrast and depth achieved during this stage. Ensure your printer settings are set to "high quality" or "photo" mode to capture the fine details of the starfish and water textures.
After printing, allow the ink to dry completely to prevent smudging. Place the printed design face down on the coaster blank. Secure it with heat-resistant tape to prevent shifting during the press. Shifting is a common issue that can ruin the alignment, especially with designs that feature central focal points like the starfish in this collection.
Heat Press Parameters and Quality Control
The success of the 3D Sea Coaster: Starfish Coaster Design ultimately depends on the heat press settings. Typical parameters for ceramic coasters include a temperature of 380–400°F (193–204°C) for 150–180 seconds with medium pressure. However, these settings can vary based on the specific brand of coaster blank and the heat press model.
Consistency is key. Document the exact time, temperature, and pressure used for each batch. This record-keeping allows for reproducibility, which is vital for business owners who need to maintain uniform quality across multiple orders. After pressing, allow the coaster to cool before removing the paper. Peeling the paper while hot can sometimes cause ink to transfer back onto the paper or result in uneven gloss.
Inspect the final product for any white spots, which indicate insufficient pressure or debris on the blank, and check for color vibrancy. The 3D effect should appear deep and immersive, with the starfish appearing to float above the ocean floor. If the colors appear washed out, adjust the time or temperature in small increments for subsequent batches.
Strategic Use Cases and Business Applications
Beyond the technical execution, understanding where this design fits in a broader business or creative strategy is essential. The 3D Ocean Coaster Sublimation asset is versatile and can be utilized in various contexts.
- Product Line Expansion: For existing shop owners, adding a sea-themed coaster to an inventory of home decor items can attract customers interested in coastal or nautical aesthetics. It complements other ocean-themed products, allowing for bundled offerings.
- Seasonal Campaigns: Summer and holiday seasons often see increased demand for beach-related decor. Planning the production of these coasters ahead of peak seasons ensures stock availability when demand is highest.
- Customization Services: While the design is pre-made, it can serve as a base for further customization. Add monograms, names, or dates using graphic software to create personalized gifts for weddings, birthdays, or corporate events.
- Marketing Content: The visually striking nature of the 3D design makes it ideal for social media content. High-resolution images of the finished coaster can be used in Instagram posts, Pinterest pins, or Facebook ads to drive traffic to your store.
Optimizing for Long-Term Efficiency
To maximize the value of the 3D Sea Coaster: Starfish Coaster Design, consider implementing systems that reduce repetitive tasks. Create presets in your design software for the 4x4 inch canvas size. Save your heat press settings for coaster blanks in a quick-access log. These small optimizations accumulate over time, significantly reducing the labor hours required per unit.
Additionally, consider the longevity of the digital asset. Since the file is a PNG, it does not degrade with use. However, keep backup copies in cloud storage and external drives to prevent data loss. Organizing your digital assets by theme, date, and usage rights ensures that you can quickly locate and deploy designs as needed.
Quality control should also extend to customer feedback. Monitor reviews and comments to identify any recurring issues with the design or production process. If customers mention fading or chipping, re-evaluate your sealing methods or heat press parameters. Continuous improvement based on real-world data is a hallmark of successful creative businesses.
Conclusion
The 3D Sea Coaster: Starfish Coaster Design is more than just a digital image; it is a tool that, when used correctly, enhances productivity and product quality. By understanding its technical specifications, integrating it smoothly into your sublimation workflow, and applying strategic business practices, you can leverage this asset to create compelling, high-quality products. Whether you are a professional marketer, a small business owner, or a creative hobbyist, the key to success lies in meticulous preparation, consistent execution, and ongoing optimization. Thank you for visiting my store, and we hope this guide helps you achieve excellent results with your sublimation projects.